Installation and authorization
To proceed with the integration installation the Twilio account and an eligible phone number is required. You can connect your existing business phone number or generate a dedicated one.
The installation of the application needs to be done by the account with the required permissions. It can be the Owner of your LiveChat license or one of Admins with Billing Permissions. Find the *Twilio SMS for LiveChat integration in your LiveChat Marketplace and add it to the cart. Once the checkout is done you should be able to click the Install/Get button in the top right corner of the integration page.
The next step is the authorization with your Twilio account.
Authorising SMS
Once the integration is installed, please go to the LiveChat Apps section, find there the Twilio integration and open its "Fullscreen app".
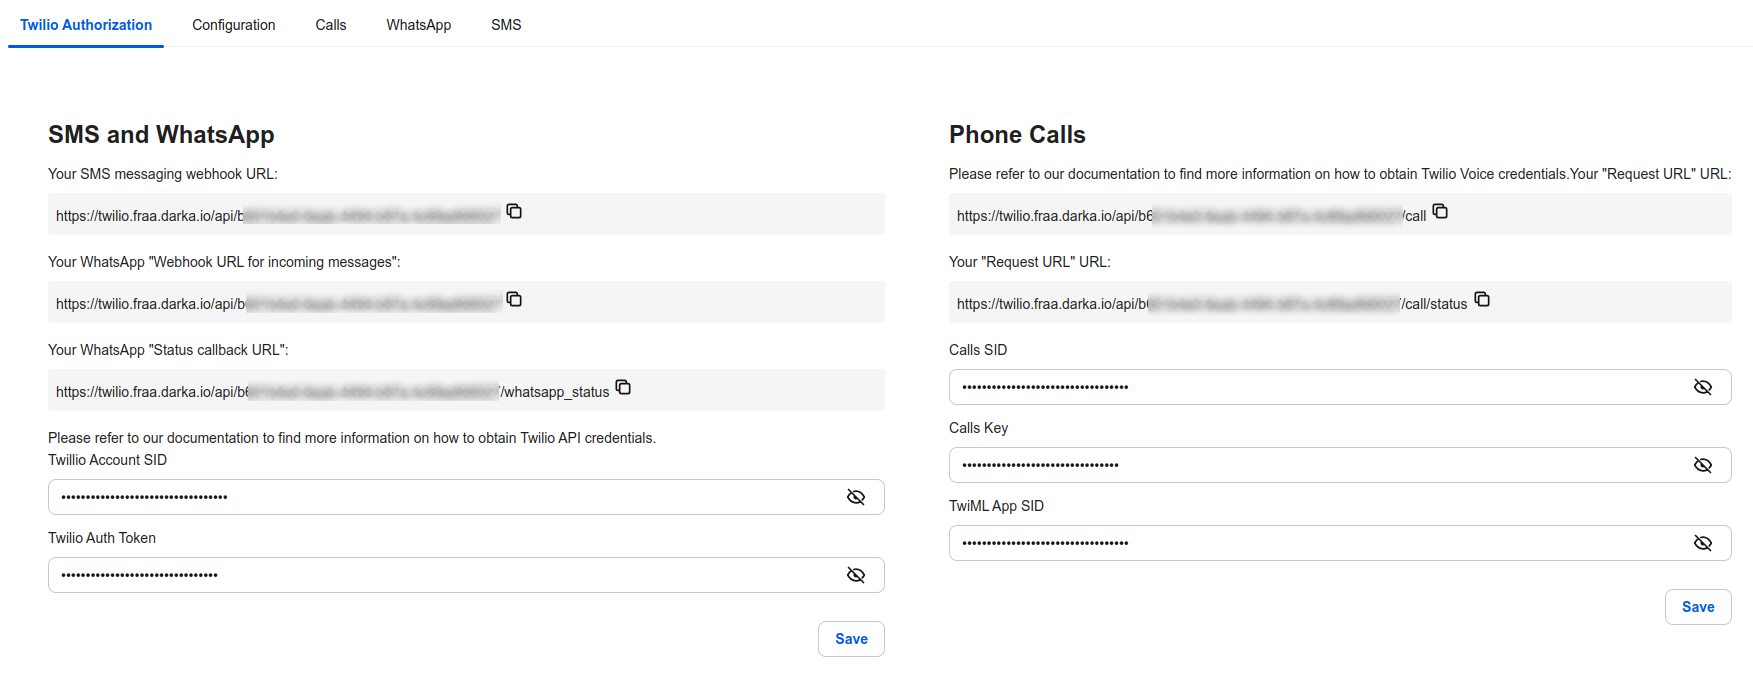
Getting Twilio Account SID and Auth Token
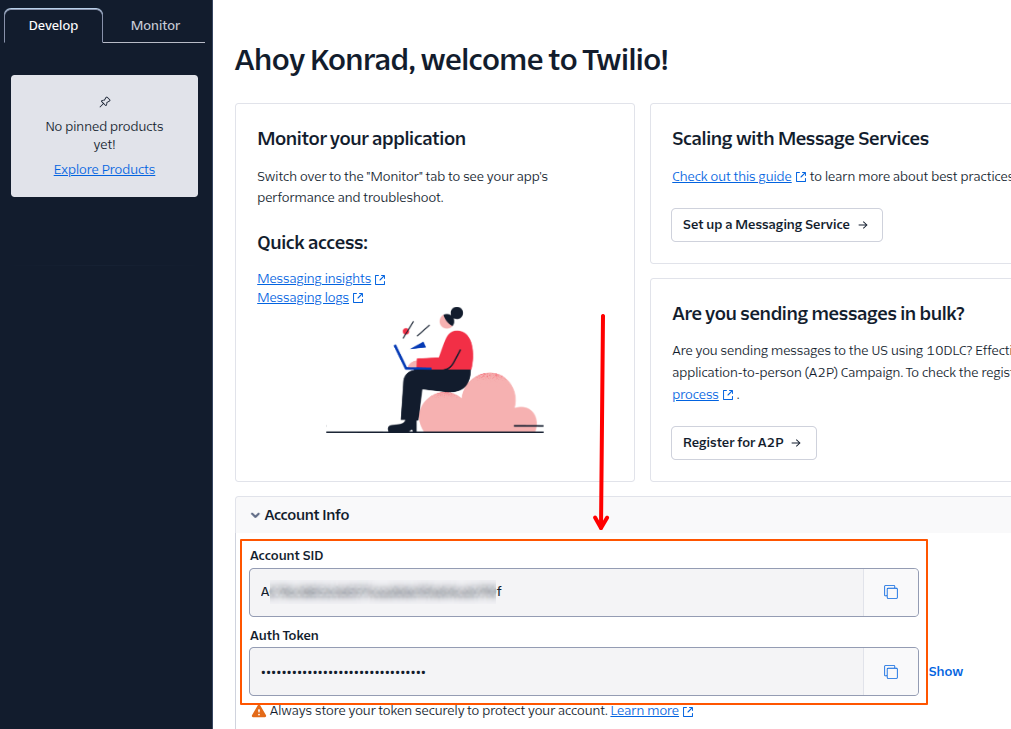
Open your Twilio account in a new browser tab or window. On the home page you will see Account SID and Auth Token. Copy them and put into your integration authorization section. Once it is done, click "Save".
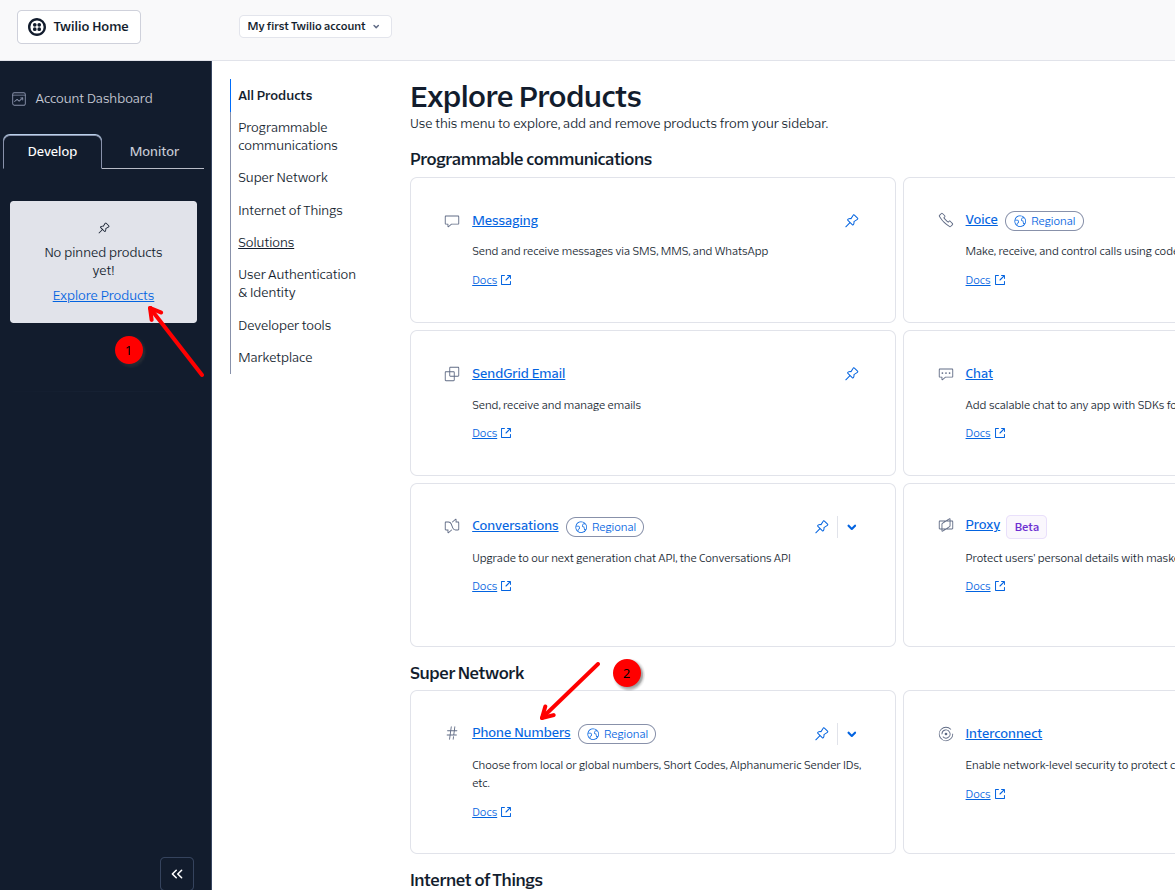
Adding the messaging webhook URL to Twilio
In your Twilio account home page choose Explore Products button and head to Phone Numbers.
Choose your chosen phone number from the list. Make sure that the number supports SMS sending.
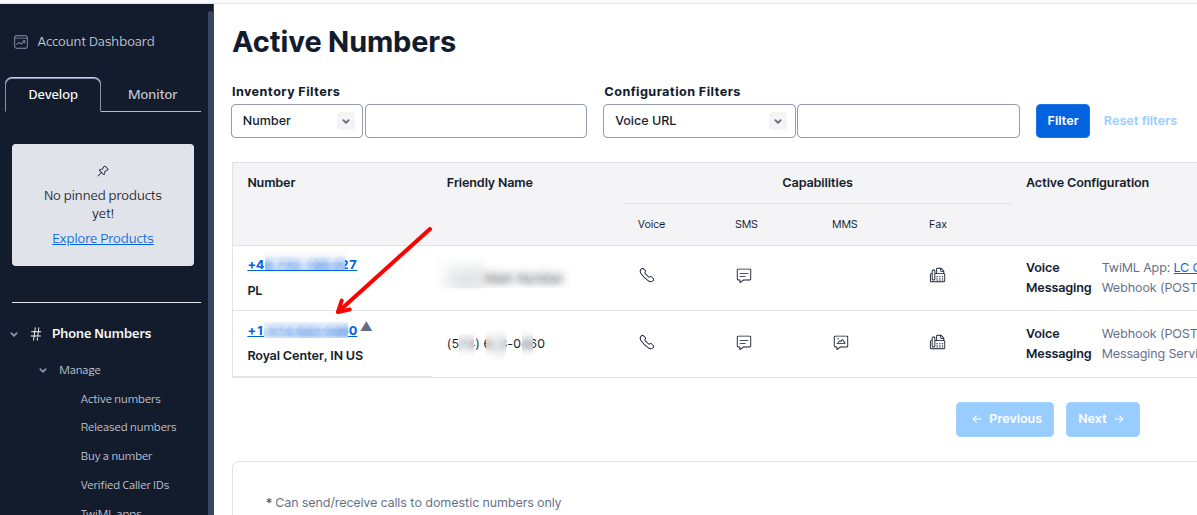
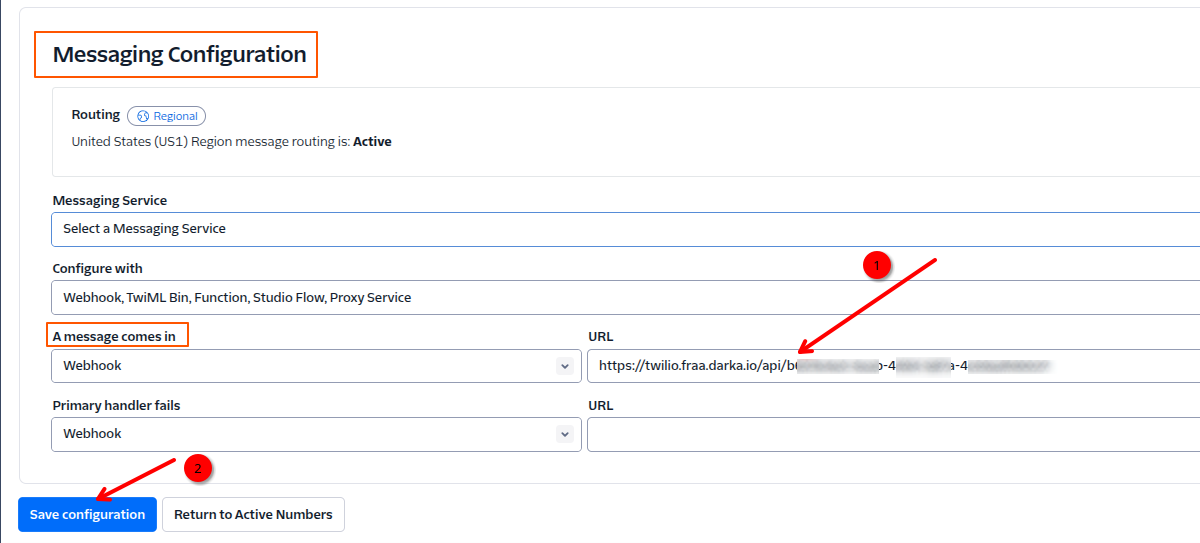
Scroll down and find Messaging Configuration. There you need to paste your SMS Messaging Webhook URL that can be found in your Twilio integation. Once it is done, remember to click Save Configuration.
In your Twilio LiveChat integration, click Save to save the new authorisation details.
Removing your numbers from Messaging Services
There is a chance that you have some Messaging Services set for your Twilio. Our integration do not utilize them and if your number is assigned to one of them, it may prevent you from sending SMS messages.
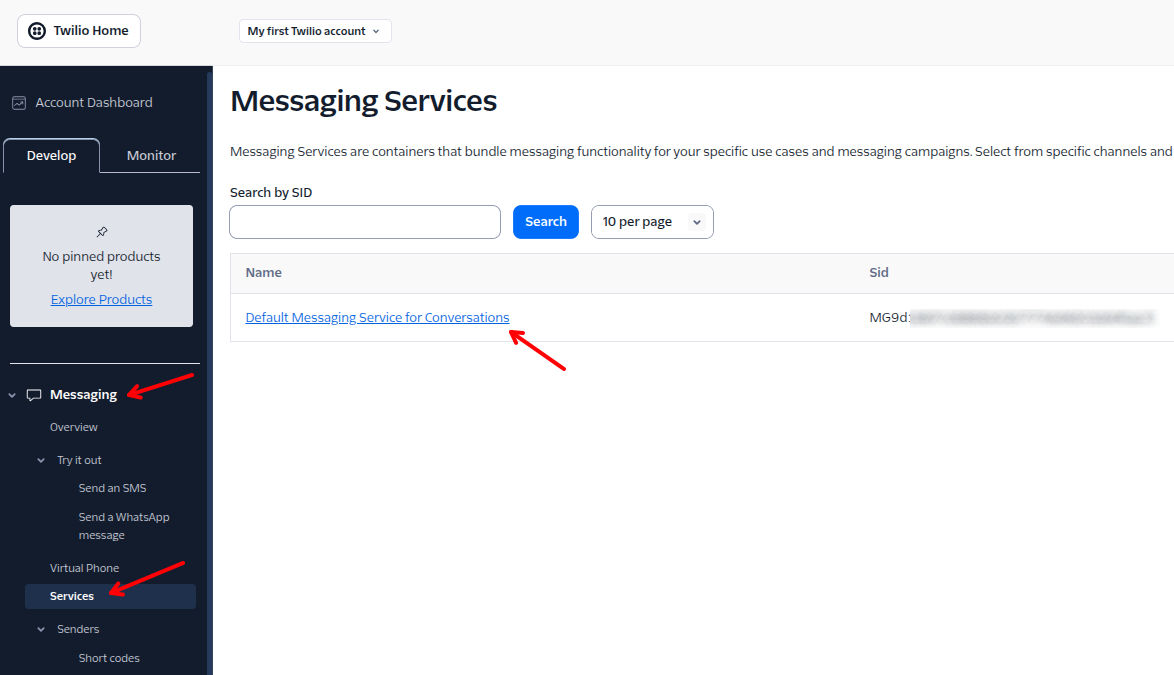
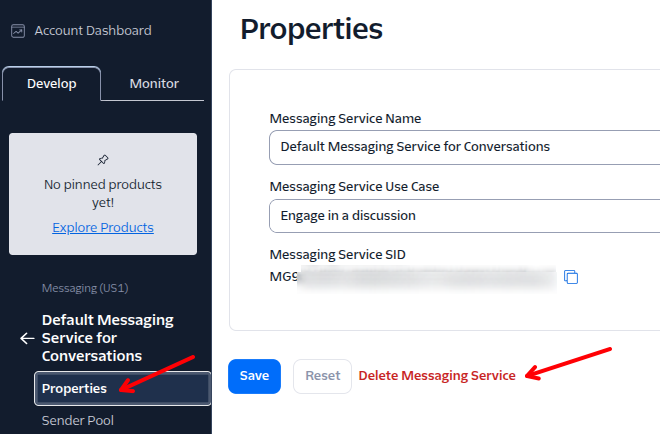
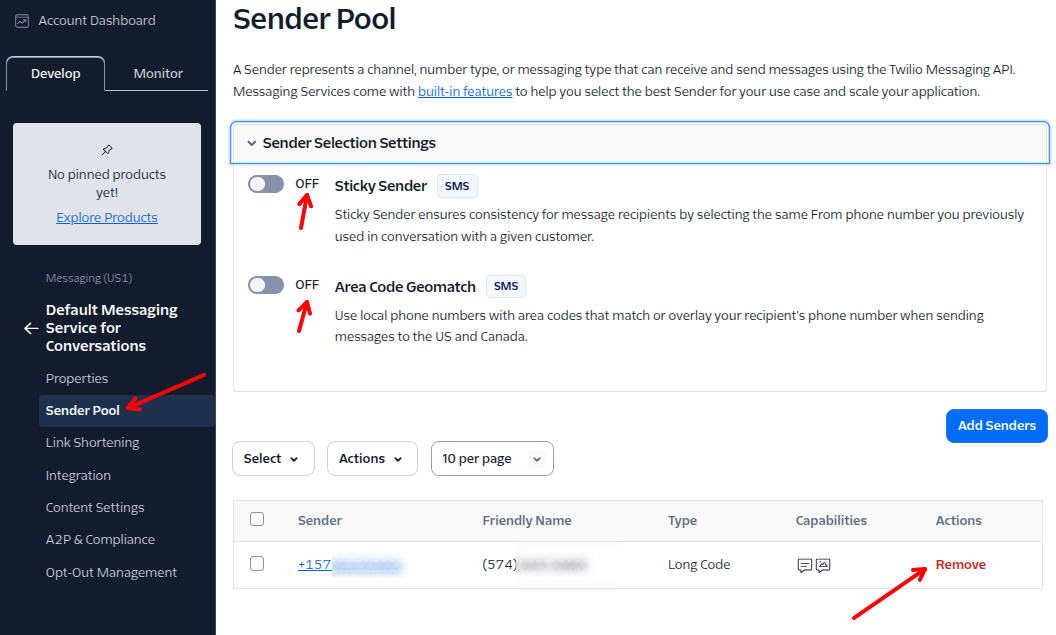
You can either remove your number from the list of senders or delete the Messaging Service with the assigned number completely.
Deletion:
Removal:
That's it! Now you should be able to receive and send SMS messages as LiveChat chats. You can visit the Configuration tab to set the Groups mapping.
Authorising WhatsApp
Getting Twilio Account SID and Auth Token
If you would like to integrate your WhatsApp number, please follow the above steps for the SMS connection. Once it is done, make sure to additionally update the Webhook URLs as described below.
Setting the WhatsApp Webhook URLs
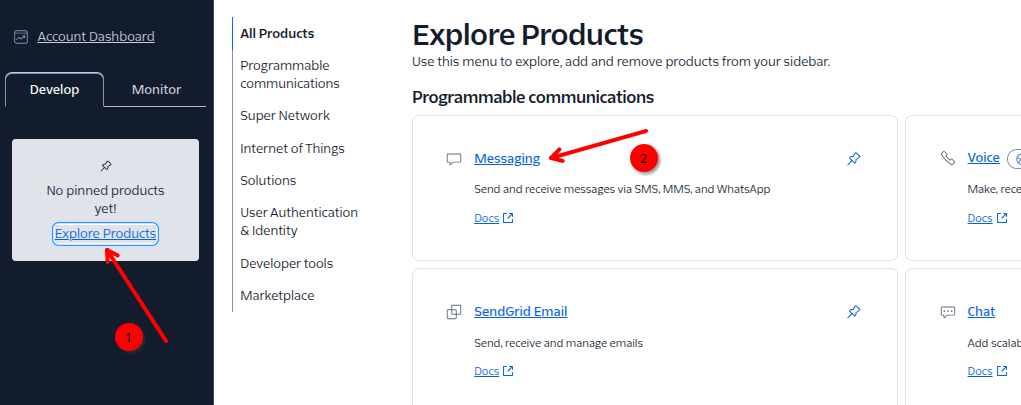
In your Twilio account home page choose Explore Products button and head to Messaging.
Navigate to Senders > WhatsApp senders and choose your chosen phone number from the list. Make sure that the number supports WhatsApp sending and is connected succesfully to your Meta account.

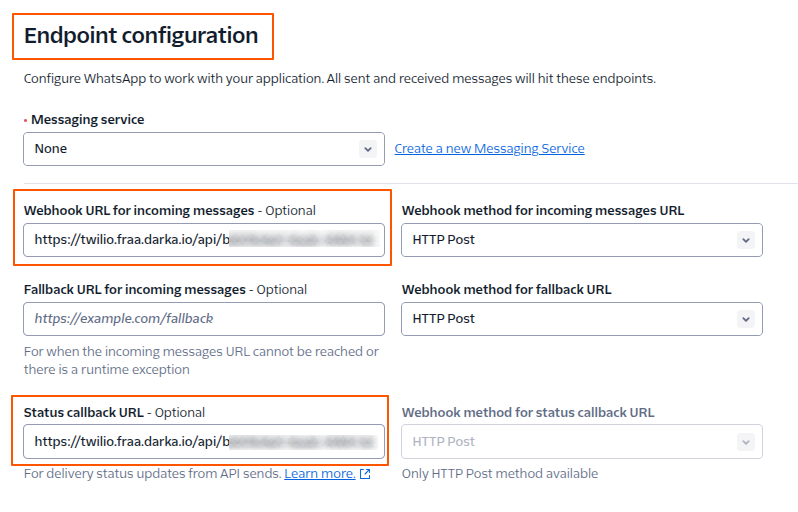
Scroll down and find Endpoint Configuration. There you need to paste your WhatsApp Messaging Webhook URL and Status callback URL that can be found in your Twilio LiveChat integation. Once it is done, remember to click Update WhatsApp Sender at the bottom of the page.
In your Twilio LiveChat integration, click Save to save the new authorisation details.
Et voila! Now you should be able to receive and send WhatsApp messages as LiveChat chats. You can visit the integration Configuration tab to set the Groups mapping.
Authorising Calling
Creating Twilio App
To authorise the phone number calling using the integration you need to create a twiml App in your Twilio console. Here can be found the dedicated article on hwo create the Twilio App.
Finding the Twilio App SID (TwimlSID)
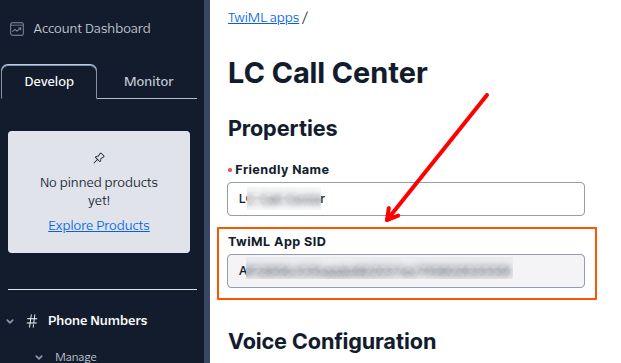
Once the app is created, please go to Explore Products > Phone Numbers > TiwML apps and choose your phone number from the list.

There you can find your TwiML App SID. Copy it and paste into your LiveChat integration authorization section.
Adding calls webhook URL to Twilio
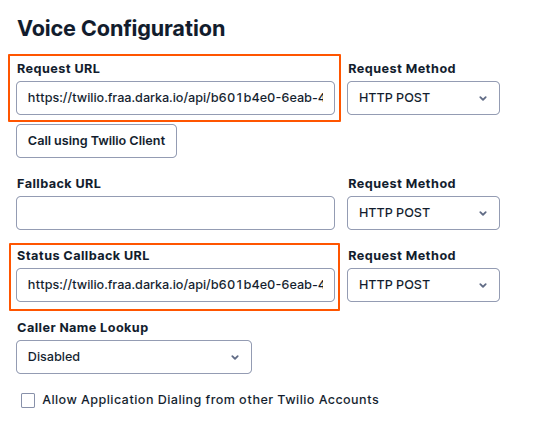
In the very same section where you found your App SID, you need to change your Request URL and Status Callback URL for Voice Configuration. The URLs can be found in your Twilio LiveChat integration. Once it is done, click Save to save the new URLs details.
Getting the authorisation API keys
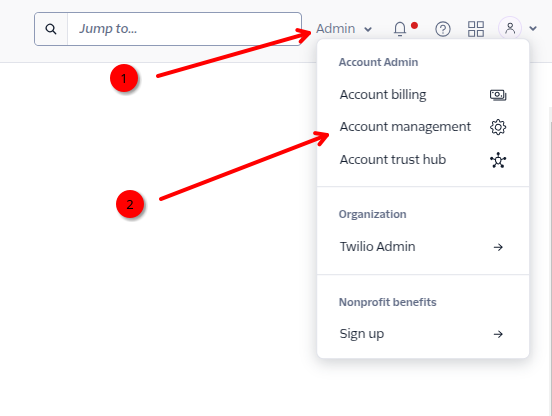
In the top right corner of your Twilio home page, click Admin and choose Account management.
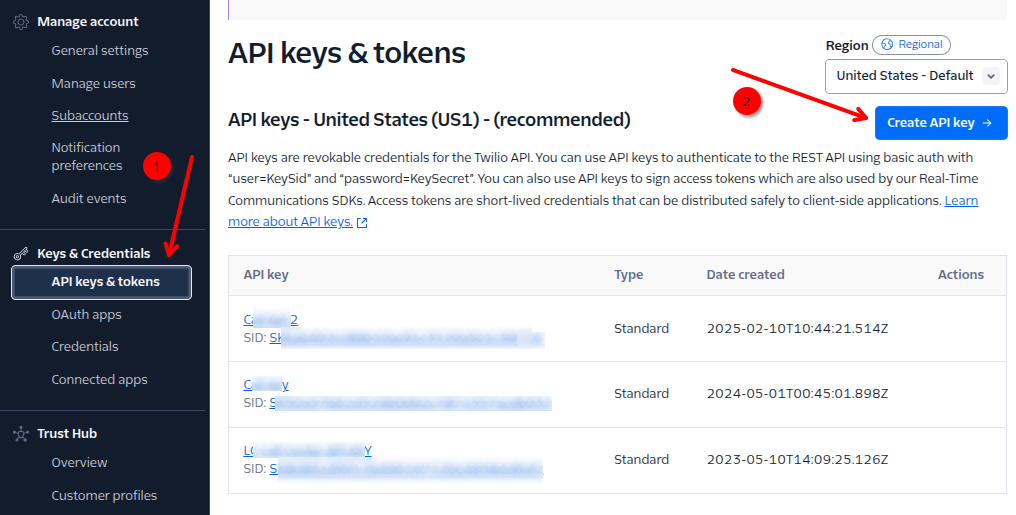
Head to API keys & tokens and click Create API key to create a new one.
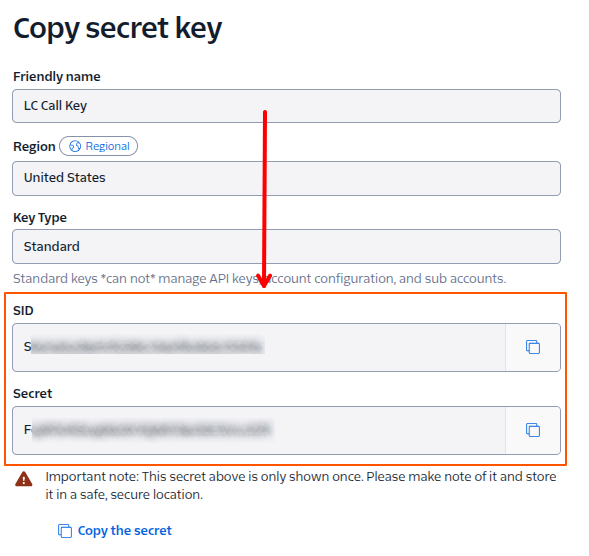
Name the key and click Create. The key details will be displayed to you. Make sure to save the secret, because it will not be possible to display it again. Copy the SID and the Secret and paste them into your LiveChat integration authorization section.
In your Twilio LiveChat integration, click Save to save the new authorisation details.
Done! Now you should be able to receive and send calls as LiveChat chats. You can visit the integration Configuration tab to set the Groups mapping.